Background

Showing posts with label Embossing. Show all posts

Monday, February 19, 2018

Session 8 Class 1


Welcome back to another scrapbooking session. This is another 10 week class and I hope you all enjoy it as much as my previous ones. 

I started off with inspiration from the current Idea Book. Versions of each of these pages show up in the catalogue, but I saw them and wanted to combine them into a cohesive 2-page layout. I used an old paper pack called Sangria that has some lovely purples, oranges and reds throughout the papers. I've used this paper previously, but usually in a fall layout. This time I played up the purple by using Eggplant cardstock as my base pages. I utilized the Center Point function on my Cricut in order to cut the heart in the middle of the page. I also used the cut out heart to over lay the strips of paper and then adhered it back onto the base page. I added texture and dimension to the left page by embossing 2 of the hearts as well as stamping a pattern on the 3rd. The mix of patterned paper and photos was balanced by the solid colour of the base pages. I finished off the layout with a couple of stamped images and some embellishments from the Sangria Complements pack. Each of the attendees to my class will be able to choose their own embellishments to make this layout unique to their own tastes. 

Sunday, April 9, 2017

Scrapaholics Unite Session 6 Class 10


I hope this layout makes everyone want to cozy up to a fire and roast some marshmallows. This is a cardstock only layout using the Camping Critters Cricut cartridge. It has such cute animal characters and sayings. I also added some wood grain embossing to some of the pieces, such as the large picture pennant. I created the background on the left page by stamping in White Daisy ink and then using white heat embossing powder. 

Monday, November 14, 2016

Scrapaholics Unite Session 5 Class 8


It's a party! This is a great layout for any celebration. I used some leftover paper from the For Always and Yuletide Carol. This is busy patterned paper, but when it's in small pieces and strategically placed around the page, it ensures that the patterns don't over power the layout. I finished it off by heat embossing the title with black embossing powder. I also used a scallop border punch for the black strips that go over the pennants, some gold sequins and random background stamping of confetti. This is a great layout for almost any paper and it allows for a large number of pictures. 

Saturday, October 29, 2016

Scrapaholics Unite Session 5 Class 6


Swan Lake is the paper pack I used for this layout. I decided to play up the femininity of the paper and use a bit of bling to fancy it up. For the title, I heat embossed in gold on black paper so it gives more of a distressed look than straight embossing. I added jewels and sequins as well as the new black and gold ribbon on the top left. I finished off the layout with some gold studs in the bottom corner to draw your eye across the page. Now I just need some girls night out pics to put on this layout. Drinks anyone?

Friday, April 22, 2016

Mother and Daughter Mini Book Workshop

Front cover and inside first page
The Mother and Daughter Mini Book Workshop is being held on May 7 at 1:30 pm. This is my sample book so you can see what you can potentially make with the book. This was a pretty quick book to make up. I used the Beautiful You Picture My Life cards and the My Creations Black Mini Book for this project. I accented with the gold foil tape as well as heat embossing several pages.
Pages 2-7
Pages 8-13


Pages 14-19
Last page
The other options for this mini book is the My Creations Kraft mini book. You can then choose your own set of Picture My Life cards from the many available. You will be purchasing at minimum a book and a set of cards to take part in the workshop (you are free to use prepurchased PML cards if you already have some).  Each pack of cards was enough to do 2 books depending on how you use the cards and how many pictures you use. I will also have accents, such as the gold foil tape, silver foil tape, washi tape and ribbons and of course many different colors of embossing powder to use along with the multitudes of stamp sets available. These extra accessories are included in the $5.00 workshop fee.

Please remember to bring along a tape runner, scissors, a paper trimmer and an assortment of pictures that can be reduced down in size to under 4"x6". 

Registration for this workshop will close next Thursday, April 28th at 8:30 pm. Please contact me with your choices of book and PML cards by the RSVP deadline. 

Sunday, January 31, 2016

Scrapaholics Unite Session 4 Class 1


I know it's not Christmas anymore, but that's the best time to scrapbook your holiday pictures. This is the White Pines paper pack from the Holiday Expressions book. It has a great zipstrip that you can see running across the top of the page. 


I added Christmas Village stamps to the bottom of the page using Cocoa ink. I coloured in certain parts of the houses to add a bit of colour to them. Each person can colour in as much or as little as they want. I added clear Stickles to the snow on the roofs of the buildings. I don't have journaling for my page yet so I used this nice silhouette stamp on the red Cranberry cardstock piece. Using Versamark ink, I stamped the image and then heat embosses it with white then I stamped it again and heat set it once more using clear sparkle embossing powder. This makes the image easy to see, but adds the sparkle I want. 


Sunday, March 8, 2015

Scrapaholics Unite Session 2 Class 6


I love this stamp set, it's the July Stamp of the month called Life is Wonderful. I've paired it with an old paper pack called Laughing Lola. It's got some great gold accents and swirls that I've accented by heat embossing the title and adding the flourish on top. If you like this stamp set as well, it's available to order during the month of July. 

Sunday, January 25, 2015

Scrapaholics Unite Session 2 Class 1


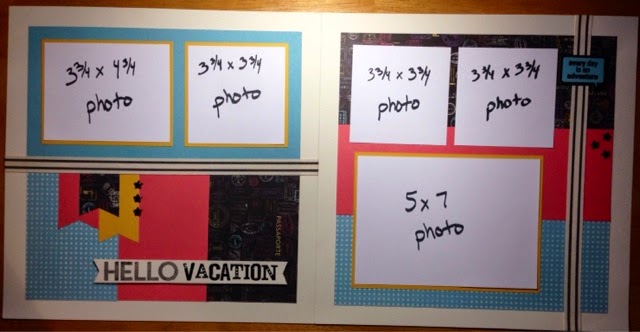
Well it's time for another session of classes. There are still some paper packs from the CTMH Annual Inspirations catalogue that I have yet to use, this week's layout is using one of them. This paper is from the Wanderlust pack. It has a great neutral blue polka dot pattern as well as a black with stamps from passports in all the colors of the pack. This paper made it easy to coordinate all of the cardstock on this layout. You will probably see more of this type of layout without pictures during this session as I am making them in preparation for events coming up (Valentine's day maybe....). 

I like the versatility of this layout with the placement of pictures as each person could move around the mats and actually add more pictures if needed. 

To complete this layout, I heat embossed the title and the sentiment on the top right of the layout and added black enamel stars. Another option is to emboss the smoothie (pinkish) paper with a pattern to add even more dimension. 

There is still room in my class on Wednesday, so if you want to drop in, please let me know!

Sunday, October 19, 2014

Scrapaholics Unite Session 1 Class 3

Here come the baby pictures! Yes, this is my newest little one, Callie. Her Auntie took some great pictures of her just after she was born so there will definitely be some more to come. I used the Chalk It Up paper pack for this layout that features stars on one side of the paper and this cool doodle on the other side. To embellish, I stamped a border along the top, added some 3D star stickers on the left side, heart stickers along the bottom right border and the fantastic glitter tape dove-tailed in the top right. I also hand drew with a pen around the Cricut starburst title and heat embossed the stamped title. 

Sunday, October 12, 2014

Scrapaholics Unite Session 1 Class 2


I know I keep on saying that I love the versatility of CTMH products, but how can you not when they keep on coming out with such great things! This is the Seaside paper pack and instead of making this layout beachy, which would be super easy to do, I've maintained somewhat of an anything goes type of layout and just added elements to make it outdoorsy instead of beachy. I started the layout with inking the edges of the paper to make all the pieces distressed like the look of the patterned paper and the stamped title. I also made the Happy circle stamp in the journaling box a bit distressed by lightly dabbing a baby wipe to the stamp to remove some of the ink. To make the buttons, I cut a couple different sizes of buttons from different colors of cardstock, then ran them through the Cuttlebug using a polkadot folder, then distressed the embossed circles with a sandblock. I knotted hemp through the holes and adhered them with 3D foam tape. 

Tuesday, November 5, 2013

DRCC Session 6 Class # 7


This is the very pretty Frosted Paper Pack. I've been borrowing a Cricut from a friend of mine and I've been putting it to good use lately. For this layout, we are visiting several spectrums: die cuts, punches, embossing, and hand cuts. The art of the layout is in the placement of the snowflakes. I hope you like it. 

Tuesday, September 24, 2013

DRCC Session 6 Class #1

Hey everyone, sorry about the lateness of this post but it has been a crazy weekend. I've used the new Laughing Lola paper and today we'll be looking at color combinations, what works and what doesn't and how to put it together. We'll also be doing some heat embossing, which is always fun and even more so with metallics!

Sunday, November 11, 2012

DRCC Session 4 Class #10


Pear & Partridge Paper was perfect for this layout since the backside of the paper was a nice subtle New England Ivy design with the fancy swirly front side. I used the part of the title from a stamp set. I liked the saying "I will always Believe", but it was quite small. I masked out the believe on the small stamp set and then heat embossed Believe with cranberry embossing powder using the Friendship Large alphabet. To add some 3D effects, I stamped the tree and the stocking on white paper, cut them out and adhered them with 3D foam tape.


I wanted to use the Cranberry Baker's twine for this page so I brought it in by tying it around a feature photo as well as the string for my stamped mittens. I then wound it once around a brad to mimic a nail and popped the mittens up with 3D foam tape as well. 

Monday, June 4, 2012

DRCC Session 3 Class #3

Sorry it's been so long since I last posted. I forgot to post this class because I was waiting for my pictures to be developed and then I just forgot. I also went to our bi-annual Scrapbooking Retreat in Banff May 25-27. Had a blast, other than having the flu for one day. So I'm catching up on my blogging.


This layout, we used a border punch to create the waves. We also heat embossed "making", but used a Slice title for "waves". Still love this paper and it's perfect for anything water related since we so obviously weren't at a beach for these pictures, just playing in the pool. 

Saturday, April 7, 2012

Covered Tea Boxes

A friend of mine and I have a table at the Riverbend craft fair coming up on April 21. I've started to make some things to sell so I began with these covered tea boxes. What I like the most is that the Thoughtful Tidings stamp set goes perfectly with this gift. Once I figured out the dimensions, the boxes were fairly easy to cover and lots of fun to decorate. I used my Slice to cut out the flowers, leaves and bookplates. I also embossed the sentiment on the front to make it stand out more.

Saturday, March 31, 2012

DRCC Session 2 Class #7


This week I've decided to do 2 title pages that could also be made into a 2 page layout. The focus for a title page is generally one large photo to help determine the type of book you are looking at. This isn't necessarily only for title pages, as you can definitely use one large picture for a one- page layout within an album. 

What I enjoyed most about this page was that everything just seemed to click. I had the argyle paper from the Cruisin' paper pack, the super cute button brads and the new Grey Wool bakers twine. The title just seemed to come to me once I remembered this great picture of Archer that a friend of mine took at Christmas. 


I tried to make the title look almost like a shirt with the button brads in between the embossed words, although it's somewhat difficult to tell that the brads look like buttons. I still like it though. 


I created this layout as a separate title page, but it can also become an accompaniment to the previous layout just with simply removing the one large picture and mat and replacing with 4 pictures (4"x4") in each corner and omitting the title. I did like how this layout turned out, mostly because it kind of looks like Archer is making an A with his arms. 


To use the bakers twine in a different way, I used it to frame the picture. I inked the edges of all of the white cardstock and the die cut initial to make the pieces have more definition when placed against cardstock of the same color. I then stamped the rest of the title. 

Monday, March 26, 2012

DRCC Session 2 Class #6


I used the Florentine paper pack for this layout. It has some great colors that complement snow and blue sky shots so it's very versatile for any scenic pictures. I used Cocoa ink and clear embossing powder for the "what a" using the Trinity Alphabet. I stamped "view" in Twilight ink using the Rustic alphabet on a piece of colonial white cardstock, which I then cut out and popped up using 3D foam tape. 


In order to add more pictures, I made a trifold out mini book on my layout. I took a 7x4" length of creme brulee cardstock and used a border punch on one end. After adhering my front picture, I folded the leftover piece of cardstock. 


I then used a 12x4" piece of Colonial White cardstock and folded it in half. I adhered my photo's to 3 sides with the folded portion to the right side. 


I attached the Creme brulee cardstock to the underside of the middle panel and attached ribbon to form a closure. 

Friday, January 13, 2012

DRCC Session 1 Class #9


I used 2 techniques for this class that are new; tearing and emboss resist. Tearing is ripping paper to reveal the white core and to give an uneven edge. I thought it added some snow-like qualities to my winter layout. 


Emboss resist is when you emboss on white paper using white embossing powder and Versamark ink. Then using coloured ink and a sponge, rub the ink overtop of the paper to reveal the white embossed image. 

Thursday, December 8, 2011

DRCC Session 1 Class #7


Considering it's almost 2 weeks until Christmas, I thought a holiday layout would be nice for the last class before the holiday break. For the title, I cut out Noel on my Slice and placed it on top of vellum with 3D foam to. I then accented with some gold stretchy cord. I also used the cord on the stockings. 


For the accents, I stamped them on Colonial White paper and then cut them out so that the detail in the stamp is more visible. I heat embossed the sleigh runner in gold directly onto the layout to give the it some extra shimmer. 

We don't have a class until January 10, 2012 but check back here as I hope to keep posting some of my other projects. Merry Christmas!

Saturday, November 26, 2011

Ribbon Tree

I thought I would try making a ribbon tree since my paper trees turned out pretty well. This was quite labor intensive because I picked smaller ribbon and decided to evenly place my ribbon in rows instead of more abstractly as I've seen other crafters do. For the star, I heat embossed a chipboard star with red glitter embossing powder. Then I wrapped wire around the star and heat embossed it again to cover the wire with red glitter.

If you like this tree, I will be selling it and some of my other Christmas crafts tomorrow at the M.O.B. Craft Fair and Trade Show at the Fish Creek Library from 1-4pm.