Background

Tuesday, February 24, 2015

Scrapaholics Unite Session 2 Class 4


This cute paper is Hopscotch. The idea of this layout came from the zipstrip on the paper as it has a bunch of speech bubbles in different shapes and colors. I then cut out a bunch of different sized speech bubbles and stamped different sentiments to highlight the theme as well.  

Monday, February 9, 2015

Scrapaholics Unite Session 2 Class 3


This is the Brushed paper pack and when I originally saw it in the book, I wasn't a huge fan of it because of the big bright flowery print. I do like the other pages in the paper pack though and using only part of the bold print really brings the whole thing together. I also used a cricut overlay from the Artbooking cartridge to cut down on the boldness as well. I feel that it adds almost a window pane feel to the flower print. This layout would be good for a generic spring layout or as an Easter layout as well. To add some extra texture, I used washi tape, some paper flowers and brads and some rhinestone flourishes. 

Monday, February 2, 2015

Scrapaholics Unite Session 2 Class 2

Valentine's Day is right around the corner and the Heartstrings paper pack is perfect to document all your lovely pictures. I like the contrast of the Lagoon and Whisper grey colors with the Cranberry and Hollyhock. I brought a lot of texture to this layout by using pattern stamps, such as the border on the right side. As well, I used the patterned paper from the pack along with the zipstrip which is the piece of paper with the arrows on it. There is versatility in the layout with the pictures as you are able to rearrange the placement to suite your needs.


I didn't use one large title this time as I felt that there was enough with the stamped sentiments. To customize the Dimensional Element chipboard hearts, I stamped on them using different patterns and then layered them with 3D foam. 

Sunday, January 25, 2015

Scrapaholics Unite Session 2 Class 1


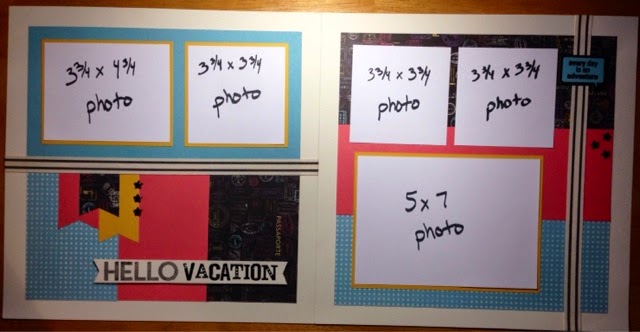
Well it's time for another session of classes. There are still some paper packs from the CTMH Annual Inspirations catalogue that I have yet to use, this week's layout is using one of them. This paper is from the Wanderlust pack. It has a great neutral blue polka dot pattern as well as a black with stamps from passports in all the colors of the pack. This paper made it easy to coordinate all of the cardstock on this layout. You will probably see more of this type of layout without pictures during this session as I am making them in preparation for events coming up (Valentine's day maybe....). 

I like the versatility of this layout with the placement of pictures as each person could move around the mats and actually add more pictures if needed. 

To complete this layout, I heat embossed the title and the sentiment on the top right of the layout and added black enamel stars. Another option is to emboss the smoothie (pinkish) paper with a pattern to add even more dimension. 

There is still room in my class on Wednesday, so if you want to drop in, please let me know!

Tuesday, November 25, 2014

Scrapaholics Unite Session 1 Class 8


I saw a blog post on Pinterest using Washi tape to make a quick flip book without Flip-Flaps quite some time ago and wanted to use it in class as it is a quick and easy way to add pictures that you still want to include on your page, but may not be quite as prominent as some others. 


My family's trip to Zoolights was the perfect example as I still wanted to include the pictures of the lights, but my son and husband were more important to showcase, obviously. The flip book was fairly easy, I just cut some paper, patterned or cardstock works, a normal mat size for my pictures then spaced them out on my page so that I can still see a portion of the picture. I then adhered the paper to the page with Washi tape and made sure it was stuck down really well by rubbing over it with my fingers several times. I also flipped the paper up and then creased the Washi tape so that a fold was premade and when the pictures are flipped through, there isn't a chance of the Washi tape coming off. If you have lots of pictures, you can also add pictures to the undersides of the paper in the book.

I finished off the page with some Christmas Village stamps, some ribbon and a circle cut out from the CTMH Artbooking Cricut cartridge. If you so desire, this layout could also be split up into a front page of a book and a back page. Just add another title to the left side. 

Monday, November 17, 2014

Scrapaholics Unite Session 1 Class 7


Confetti Wishes - the name just screams cakes and cupcakes and parties, doesn't it? As I sat at my work desk looking at this paper and trying to get some inspiration, I received my latest CTMH order. In that order was the December Stamp of the Month, Cutie Pie. Well the layout just got slapped together after that. Mind you, I had to finish up the cards for the workshop coming up this weekend, so that's why it's a bit later than usual, sorry all! I did find the layout from Scrapbook Generations on this blog post, with my own added spin on it of course, but they do have some excellent layouts. 


To create the 3 colored cupcake on the top left of the page, I stamped the stand in Pacifica ink, then stamped the cupcake twice, once in Crystal Blue and once in Petal (purple).


I then cut out all 3 images, but only cutting out the top portion of the cupcake in the purple.


I adhered the cupcake onto the stand and used 3D foam to put the top purple half of the cupcake on. I added purple Stickles for the cherry and blue stickles for the bottom wrapper of the cupcake. 


I finished off the page by adding Stickles to the hearts on the title and the wooden Polaroid frame. I also used some glitter tape to add some more sparkle and a bit of ribbon under the title. 


Sunday, November 16, 2014

2014 Christmas Card Workshop

I had some fun with the cards as I did play with the Artfully sent CTMH Cricut Cartridge a bit. I also used Art Booking and Art Philosophy for some elements on the cards as well. I had a request from one of my ladies, to use one stamp set so that if someone wanted to, they could purchase it and complete more of the cards at home. It can be challenging to use only one stamp set for Christmas cards, but that's also because I have quite a collection of Christmas Stamp sets that I love to use. Anyway, here are the cards that we will be making on Saturday. Let me know which one is your favorite. I hope you enjoy!