The Kaleidoscope paper works well with an Easter theme so I decided to play up the bits of color in the paper by tissue paper inking my eggs. I cut out the bunny and the title with the Artistry Cricut cartridge and these cute eggs are on the Art Philosophy one. I just added some washi tape to finish it off. There is lots of room for a journaling block if needed.
Background
Monday, March 21, 2016
Sunday, March 13, 2016
Scrapaholics Unite Session 4 Class 7
Well this layout was a bit challenging because I wanted to leave the layout open to events other than St. Patrick's Day. If you replace the shamrocks and the horseshoe's then it's just a spring layout. I like that the colours worked well together. The patterned paper is from the new Penelope paper pack. An alternative to the dark green (topiary) colour is Thistle, a nice purple. I will give my class the choice of making this a spring layout or a St. Patrick's Day layout. I'll post the alternative layout if I have a chance to make it up before class happens.
I used Cricut shapes for the horseshoe border and the shamrocks from . I curved the stamp "Somewhere over the rainbow" to fit with the curve of the rainbow.
Sunday, March 6, 2016
Scrapaholics Unite Session 4 Class 6
I can't believe we're at class 6 already. I feel like it just started. It's nice that I am getting positive feedback from my students. They are loving the layouts. I'm just hoping the rest of the blogosphere is as well. This is the Urban paper and most people see masculine layouts with it. In order to appeal to the masses, I've made it more of a family layout. I used an old stamp set with stamps that fit inside a 2x2 square so these were great to fit along with this cool layout with the blocks on the side. As I just realized that I forgot to write my photo sizes on the white paper, the left picture is a 4x6 and all of the white squares on the right at 2x2. You can also fill in every square with a photo as well, or expand past the current blocks with photos too. To create the title, I cut out a shape using the Artbooking Cricut cartridge, did some background swirls underneath and then adhered with 3D foam tape.
Monday, February 29, 2016
Scrapaholics Unite Session 4 Class 5
I have had a few people say that the didn't really like the La Vie En Rose paper pack. Now I've said this about a few before so I held my tongue about this one and just thought, well, you need to see it differently sometimes, that's all. When you see the paper in the catalogue, you're somewhat thrown off by the big bold print of the flowers that you don't notice the really cool geometric black and white patterns in it. So I decided to play it up a bit by using the new Cascading Charms stamp set along the bottom of the layout. Then with the flower paper and the black and white paper and a white matte, it really plays up the red and makes the flowers more subtle. I accented using the zip strip on the top right and added a simple title.
Sunday, February 21, 2016
Scrapaholics Unite Session 4 Class 4
This is a great preview of the March Stamp of the Month called Sunshine Birdies. I combined it with the Kaleidoscope paper for a symmetrical layout that has room for lots of pictures. I got this layout from the Scrappin Katy Blog here. She used Kaleidoscope paper as well, but in a different way. To do the title, I used the sun cut from the Artiste Cartridge and then stamped the "You are my sunshine" onto a circle then popped it up with 3D tape. I then finished the layout off with some buttons and the new silver foil tape in the corners.
Saturday, February 13, 2016
Scrapaholics Unite Session 4 Class 3
I am in love with this layout, not just because of my adorable kids, but because it has a wonderful subtle tone to it. This is the Charlotte Paper Pack and it has this great heart and arrow theme to it. Perfect for a love layout and just in time for Valentine's day. I used a Picture My Life card for the left side of the layout and added a simple title from the Artistry Cartridge with some black hemp tied around some of the letters. Using the Artfully sent and Artistry Cartridges, I made the heart die cuts for the right page. I popped up the heart and arrow card and then put 3D hearts underneath. To pop out the heart circles, I just placed them on some Smoothie cardstock, added a few stamps and I was done. See the close up pics of the title and heart below.
Sunday, February 7, 2016
Scrapaholics Unite Session 4 Class 2
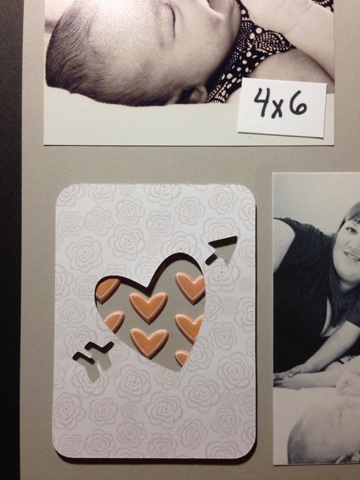
I'm going to apologize in advance for the not so good picture, but you can only do so much with a phone camera. Sometimes they're pretty good, but not the best this week. This layout looks super cute in person. I'm using the Regatta paper pack with the gradient paper and on the other side of the gradient paper is a light blue stripe on white, very hard to see from here, but it is visible. To add some fun to the title, I placed the gold polka dotted Washi tape on white cardstock and cut out "Bright" with the new Artistry Cricut Cartridge. I then adhered it with 3D foam tape before stamping "Life is". I finished off the layout with more Washi tape and some antiqued brass embellishments. I also forgot to write in the sizes of the photos. All of the white papers on the pomegranate paper are representative of photo's, sorry about that, I usually write the sizes on them.
Subscribe to:
Posts (Atom)