

Showing posts with label CTMH. Show all posts
Showing posts with label CTMH. Show all posts
Tuesday, March 20, 2018
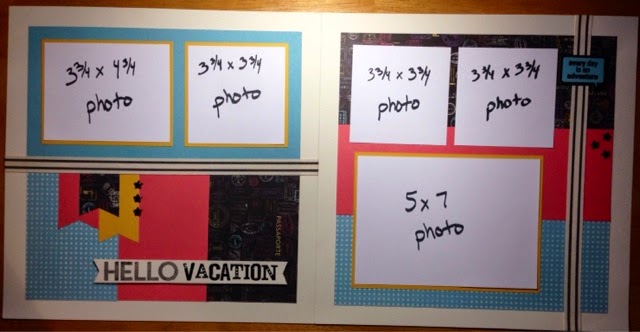
Session 8 Class 5
Sunday, October 22, 2017
Scrapaholics Unite Session 7 Class 6

This layout features the Feel So Blessed September Stamp of the Month. It has a beautiful feather image as well as some lovely sayings on it. I created the feather paper strips by randomly brick layering the feather stamp set using one of the new CTMH colours, Charcoal. I used the Falling For You paper pack as the patterned paper. I accented the page with a lovely flower Cricut cut and the title from the Flower Market cartridge. I used one of the many sayings from the Feel so Blessed stamp set which features outlined letters that I took advantage of and coloured in on the sentiment using the yellow for the two words I wanted to stand out. I also coloured in the leaves that I stamped to frame the sentiment. To complete the layout, I used the zipstrip from the Falling for You paper pack, some grey ribbon and grey sequins.
Sunday, October 8, 2017
Scrapaholics Unite Session 7 Class 4

This week's layout is made by a guest designer, Carissa Peach. She's my very talented sister/photographer and while she was visiting me during the summer she helped me out by creating this super cute layout. She actually credits my son with the idea as he tells the cutest kid joke:
Kid: What did one cactus say to the other?
Parent: I don't know...
Kid: You look sharp!
He delivers that joke in the best way. Totally corny, but when you have cactus paper and some super cute colours, it makes for a great title! She also cut out some extra cacti from the Flower Market Cricut cartridge and then accented with some cute stamps. I also like that she incorporated the supercute zipstrip from the Prickly Pear paper pack on the top of the right photo well. To add some texture, she did a background tone-on-tone stamp on the Tangerine paper on the left.
Friday, March 3, 2017
Scrapaholics Unite Session 6 Class 5

In my wish for warmer weather and to be able to be outside for longer than 10 minutes without freezing, I created this cute BBQ/Picnic layout. This is the Dreamin Big paper pack and I love the use of the Poppy red, Slate grey and Juniper colours together. I played up the red a bit more in this layout because I always think of a red checked table cloth for a picnic.
I only used one side of the patterned paper as I will be using the opposite side, a beautiful floral, in an upcoming class (maybe with some cute bunnies on it...). To add some dimension, I embossed the long Poppy strips with the Wood Slats folder to make it look like a picnic table. In order to get the entire strip embossed, I did one half, then flipped the paper and embossed the other half. Because it's an uneven pattern and it's going to be covered up eventually, I didn't worry about the middle section aligning.
I made the title block using Cricut Craft Room and the Artistry Cartridge. It was super easy to size the title and to then also cut the rectangle to the correct proportions. The far right block I just stamped a BBQ and a few accessories, but you can leave it blank for journalling or place another picture there. I then added the Poppy twine.
To complete the layout, I cut up some words from the zipstrip and added some sequins in the bottom right
Sunday, January 29, 2017
Scrapaholics Unite Session 6 Class 1

Welcome back everyone! Another session is starting and I hope everyone will be excited for the new layouts. I've got some cute ideas I'm hoping to try. If you have any suggestions for topics of layouts, please feel free to email me.
The first layout is featuring the new Some Kinda Wonderful paper pack. I've been itching to do a coffee layout, but it's easily transformed by not using the coffee cup and savoring something else. I like the format of the pictures in this layout by clustering them but having lots of room for multiple pics. There's also room to add smaller pictures that aren't matted. The coffee cup will can also serve as a journaling space.
I completed the layout by adding a chalkboard pennant and used the Chalkboard Marker from CTMH to write #coffee. I also used the zip strip sayings and added them in that corner as well. I used the CTMH Artistry cartridge to cut out Savor and the coffee cup. Finally, I placed a heart jewel inside the heart on the cup cozy and popped the coffee cup with 3D foam tape.
Sunday, October 16, 2016
Scrapaholics Unite Session 5 Class 4

This layout is a combination of the Magical paper and an old stamp set call Ticket to Ride. It was a stamp set that went with the old CTMH paper pack called Zippidee. These are all great items for Disney pictures, but I wanted a layout that was more versatile. I don't have Disney pictures so this layout will be full of some Calaway park pics from this past summer. It would also be perfect for a road trip. I also liked that this layout used the entire B&T sheet of paper including the zipstrip. I added corner arrow stamps along with stamping the road sign title and tickets. I finished off the layout with some glitter tape and some black stars.
Monday, October 10, 2016
Scrapaholics Unite Session 5 Class 3

Amidst all this snow we've been having let's warm up and with a nice summer layout. This is using the Calypso paper pack. I used one side as my base pages and then used the other side of the paper for the blue strips on the top and bottom then the zipstrips for the colourful words along the top of the layout. I added a journaling block on the left page and embellished with a stamped tree and some stamped circles and hearts then popped them up with 3D foam tape on top of the tree. The versatility of the layout is nice as you can put pictures in whichever arrangement suits you best. I just highlighted one picture by placing it on a Lagoon mat. I finished it off with some pink polka-dotted washi tape and a Pear title cut from the CTMH Artbooking cartridge.
Sunday, March 27, 2016
Scrapaholics Unite Session 4 Class 9

While I didn't use any CTMH patterned paper for this layout, I did get inspiration from the CTMH Artbooking cartridge. It has some good sports pages and die-cuts to cut out. This layout does have the freedom to place a number of pictures throughout the layout, but I limited myself to the team picture and a few others so as not to overload the layout as I wanted Archer to be the focus. An alternative would be to put more pictures that are smaller instead of a few larger. I also used the small orange cardstock piece as a mat, but it could also be used as a journaling block. I am letting my students choose their sport and team color to accent with. I might post some alternatives if I remember!
Saturday, February 13, 2016
Scrapaholics Unite Session 4 Class 3

I am in love with this layout, not just because of my adorable kids, but because it has a wonderful subtle tone to it. This is the Charlotte Paper Pack and it has this great heart and arrow theme to it. Perfect for a love layout and just in time for Valentine's day. I used a Picture My Life card for the left side of the layout and added a simple title from the Artistry Cartridge with some black hemp tied around some of the letters. Using the Artfully sent and Artistry Cartridges, I made the heart die cuts for the right page. I popped up the heart and arrow card and then put 3D hearts underneath. To pop out the heart circles, I just placed them on some Smoothie cardstock, added a few stamps and I was done. See the close up pics of the title and heart below.


Monday, March 30, 2015
Scrapaholics Unite Session 2 Class 9

I had almost forgotten about this stamp set when I was looking for inspiration for this week's layout and saw another rainbow layout. The stamp set, Rain or Shine is from the Annual Inspirations 1 catalogue. I used multiple patterned papers from several B&T packs to create my paper rainbow. Using a Cricut cut of a cloud, I stamped the title onto it and I also stamped a sun on a circle to place behind it to emphasize the title. I also stamped the little rainbow, then colored it in with pencil crayons. I finished it off with heart shaped brads in multiple colors.
 |
| Clouds and rain stamps on the block to create random stamp. |
I created a custom background by placing the clouds and rain altogether on a block then stamped it in succession on the Whisper Grey paper using Whisper ink.
 |
| Close up of background stamp. |
Monday, February 9, 2015
Scrapaholics Unite Session 2 Class 3

This is the Brushed paper pack and when I originally saw it in the book, I wasn't a huge fan of it because of the big bright flowery print. I do like the other pages in the paper pack though and using only part of the bold print really brings the whole thing together. I also used a cricut overlay from the Artbooking cartridge to cut down on the boldness as well. I feel that it adds almost a window pane feel to the flower print. This layout would be good for a generic spring layout or as an Easter layout as well. To add some extra texture, I used washi tape, some paper flowers and brads and some rhinestone flourishes.
Sunday, January 25, 2015
Scrapaholics Unite Session 2 Class 1
Well it's time for another session of classes. There are still some paper packs from the CTMH Annual Inspirations catalogue that I have yet to use, this week's layout is using one of them. This paper is from the Wanderlust pack. It has a great neutral blue polka dot pattern as well as a black with stamps from passports in all the colors of the pack. This paper made it easy to coordinate all of the cardstock on this layout. You will probably see more of this type of layout without pictures during this session as I am making them in preparation for events coming up (Valentine's day maybe....).
I like the versatility of this layout with the placement of pictures as each person could move around the mats and actually add more pictures if needed.
To complete this layout, I heat embossed the title and the sentiment on the top right of the layout and added black enamel stars. Another option is to emboss the smoothie (pinkish) paper with a pattern to add even more dimension.
There is still room in my class on Wednesday, so if you want to drop in, please let me know!
Tuesday, November 25, 2014
Scrapaholics Unite Session 1 Class 8

I saw a blog post on Pinterest using Washi tape to make a quick flip book without Flip-Flaps quite some time ago and wanted to use it in class as it is a quick and easy way to add pictures that you still want to include on your page, but may not be quite as prominent as some others.

My family's trip to Zoolights was the perfect example as I still wanted to include the pictures of the lights, but my son and husband were more important to showcase, obviously. The flip book was fairly easy, I just cut some paper, patterned or cardstock works, a normal mat size for my pictures then spaced them out on my page so that I can still see a portion of the picture. I then adhered the paper to the page with Washi tape and made sure it was stuck down really well by rubbing over it with my fingers several times. I also flipped the paper up and then creased the Washi tape so that a fold was premade and when the pictures are flipped through, there isn't a chance of the Washi tape coming off. If you have lots of pictures, you can also add pictures to the undersides of the paper in the book.
I finished off the page with some Christmas Village stamps, some ribbon and a circle cut out from the CTMH Artbooking Cricut cartridge. If you so desire, this layout could also be split up into a front page of a book and a back page. Just add another title to the left side.
Monday, November 17, 2014
Scrapaholics Unite Session 1 Class 7

Confetti Wishes - the name just screams cakes and cupcakes and parties, doesn't it? As I sat at my work desk looking at this paper and trying to get some inspiration, I received my latest CTMH order. In that order was the December Stamp of the Month, Cutie Pie. Well the layout just got slapped together after that. Mind you, I had to finish up the cards for the workshop coming up this weekend, so that's why it's a bit later than usual, sorry all! I did find the layout from Scrapbook Generations on this blog post, with my own added spin on it of course, but they do have some excellent layouts.
.JPG)
To create the 3 colored cupcake on the top left of the page, I stamped the stand in Pacifica ink, then stamped the cupcake twice, once in Crystal Blue and once in Petal (purple).
.JPG)
I then cut out all 3 images, but only cutting out the top portion of the cupcake in the purple.

I adhered the cupcake onto the stand and used 3D foam to put the top purple half of the cupcake on. I added purple Stickles for the cherry and blue stickles for the bottom wrapper of the cupcake.

I finished off the page by adding Stickles to the hearts on the title and the wooden Polaroid frame. I also used some glitter tape to add some more sparkle and a bit of ribbon under the title.
Sunday, November 16, 2014
2014 Christmas Card Workshop
I had some fun with the cards as I did play with the Artfully sent CTMH Cricut Cartridge a bit. I also used Art Booking and Art Philosophy for some elements on the cards as well. I had a request from one of my ladies, to use one stamp set so that if someone wanted to, they could purchase it and complete more of the cards at home. It can be challenging to use only one stamp set for Christmas cards, but that's also because I have quite a collection of Christmas Stamp sets that I love to use. Anyway, here are the cards that we will be making on Saturday. Let me know which one is your favorite. I hope you enjoy!


Thursday, November 6, 2014
Scrapaholics Unite Session 1 Class 6

Saturday, October 25, 2014
Scrapaholics Unite Session 1 Class 4

Of course I had to do a Halloween layout considering that Halloween is next Friday. This is the Scaredy Cat paper pack. I cut out 2 spider web borders from the Cricut and had to play around with them a little bit in order for them to fit under the centre pieces. They turned out great as I just cut the one edge off of the middle sections to make it more continuous. I also cut out the title on the Cricut, but will be letting my class pick out their titles in class as I have a great monster cartridge with some good ones. I also found some cute jewels, the chevron washi tape and journaling tags on sale for embellishing.
Sunday, June 1, 2014
DRCC Session 7 Class #11

Alright ladies, this is the last class of the session. While most of my layout designs are from the CTMH voluminous series of design books, I recently saw this blog post from Creating Keepsakes and thought that the layout by Jing-Jing Nickel would be a great class for my ladies. Of course I have changed it somewhat as I don't have quite as many layers, but the concept is about the same and I got to use lots of washi tape!!
I cut out the title using the CTMH Cricut Artbooking cartridge and the background large circle was from the Artiste cartridge.
I used the Balloon Ride paper pack again as the colors matched so wonderfully, but I pulled out the green of the water in the hippo tank by using Juniper as a mat for the pictures and in the washi tape as well. I added accents of the sorbet this time, by only using the ribbon.
This may be the last blog post for some time, until baby #2 arrives and we settle in over the summer (although I did do a super cute layout at the last retreat that I would love to share), but I will be having workshops in my basement as I've been able to stumble upon some great deals on tables and chairs recently so that I have somewhere for everyone to sit and work on! I'm excited to host them in my own home as it will definitely make it a bit easier for me especially with 2 kids, but I will definitely miss my class at Deer Run. It has been marvellous these past 3 years and I hope you all can come to my house for my classes! I do think we'll still have crops in the south occasionally, but the cry from my north ladies is quite loud lately. Please comment and share and I will see you again in the Fall!
PS. there may be a new post in August about the wonderful new Idea Book coming out and possibly a baby pic or 20...
DRCC Session 7 Class #10

As my class is aware, I am pregnant with baby number 2 who is due at the end of July and I am getting quite tired lately. Since we've missed 2 classes in a row, which is not only my fault, we will be doing a 2-layout class this upcoming Tuesday as the last class in the session.
I used a pre-designed layout from the CTMH Cricut cartridge Artbooking to make this pretty cool layout. My son is in soccer this year, but I have yet to get the pictures in so I'm hoping to put them in this layout. When the pictures are in the layout will be a little bit less videogamey and more sporty. I promise!
Tuesday, April 15, 2014
DRCC Session 7 Class #5

Sorry about the picture everyone. I just seem to be in such a rush lately that you're lucky to get a picture at all! Another one I will need to repost later on anyway since I do want to increase the size of the left picture to a 5x7.
This is the Ivy Lane paperpack I'm using and I do like the bold print of the flowers. It's a nice contrast with the mild pattern on the back side which is a monochromatic green. Because the layout itself has a lot going on, I kept the accents to a minimum. Some rhinestone flourishes and a flower. The lighter pink piece with the flower on the right side is for journaling, although you could turn the pages and use the darker pink as a journaling space as well.
Subscribe to:
Comments (Atom)