Background

Showing posts with label Journaling. Show all posts

Thursday, October 2, 2014

Scrapaholics Unite Session 1 Class 1


Welcome to my new class! I'm excited to have the workshop in my basement up and running. It's taken some time, but it's finally ready. It is a basement and it's basic, but it's spacious! The first class of the 8-week session starts on Wednesday, October 8 at 7:30pm. If you would like more information or to register, please email me. There is also an advanced drop in option in case you are only able to make it to my class on occasion, just let me know by the day prior and I will make sure to have a kit prepared for you. 

The first layout we are doing is a classic Autumn layout using the new Pathfinding paper pack from CTMH. The colors incorporated in the paper are a great complement to each other. This layout has also used up the last of the pictures from this family photo shoot so no more to scrap! Now I need to put them in an album! 

Instead of a journaling block, I chose to use a word puzzle stamp on the left page. The technique I used is first stamping the word puzzle in one color, then stamping it on an extra piece of cardstock in a second color, then cutting out the words that I wanted highlighted and then placing them on top of the original stamped paper using 3D foam tape. 

I utilized the zip strip from the paper to create the fun journaling strips on the bottom of the right page and used a pennant image from the CTMH Artbooking Cricut cartridge to add to the celebrate theme. 

See you on Wednesday!

Saturday, November 3, 2012

DRCC Session 4 Class #8


This lesson is about journaling. I chose to do 6 things I love about my son and put them on tags that are hidden behind the B&T (patterned) paper. I have given my students an assignment to think of 6 things, about anything. This is to get them to write down their thoughts and to know that even if you may not like your own writing or someone at one time or another has commented about it, that it's still a part of you and it should be included on your pages. 

I stamped the title and popped each word up with 3D foam tape. I then added some durable studs in the top right corner and some Rosette ribbon in the bottom left.


As you can see from the above picture, the tags with the numbers attached just pull out from the square of paper. The trick with this is to only put adhesive on 3 sides of the paper, leaving the top open to form a pocket. 

Monday, June 4, 2012

DRCC Session 3 Class #5


I slightly struggled with this layout as I wasn't sure what to put in the blank space on the left side of the layout or how to do the title. I finally decided to stamp my title in Twilight and add a bit of flourish with a small flower stamp in Cocoa on each letter. If you have extra pictures, which I may look for to go with this event, you can always add more on the right side of the layout. 


To fill in the blank space on the left side, I stamped a large flourish and then created a pocket for my journaling tag. I affixed the brad through both ends of the ribbon, but hid the back of the brad behind the flower. 


Tuesday, January 3, 2012

DRCC Session 1 Class #8


For this class I kept the layout fairly simple as the lettered paper is quite busy. I punched holes through the new Milepost stars to create a cool 3D accent, then strung a piece of hemp through the holes to make a banner. 


I found these cute little paper bags that I thought made a good spot for some hidden journaling or a special stamp like I did here. 


For the title, I cut out this shape on my Slice and then used rub-ons for the letters. This is the Typeset paper and it is great for school pictures as well. 

Thursday, November 24, 2011

DRCC Session 1 Class #5


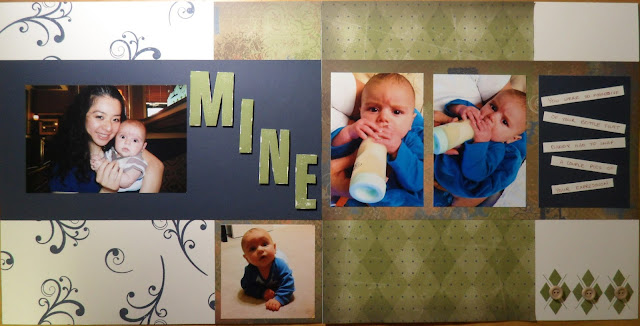
This week we will be creating our own background page by random stamping. We will also be exploring a different kind of journaling using strips of paper. I also added some embellishments using the new wooden buttons.